Here are the steps for installing the browser version of OMSSA. This
was a very simple installation and anyone should be able to get this to
work. We did have a little problem when the program was trying
to access the internet and we failed to see our firewall dialog box
in order to allow the access, this was not OMSSA's fault. You can download the OMSSA
browser version at
http://pubchem.ncbi.nlm.nih.gov/omssa/browser.htm. As
shown in Figure 1 below, you can choose the Windows, Mac, or Linux
version for download.
Note: In Figure 1 below the "Download" button leads
to the command line driven version of OMSSA, and the "Browser"
button leads to the browser version of OMSSA. Most users will
want to download the browser version of OMSSA.
Figure 1.
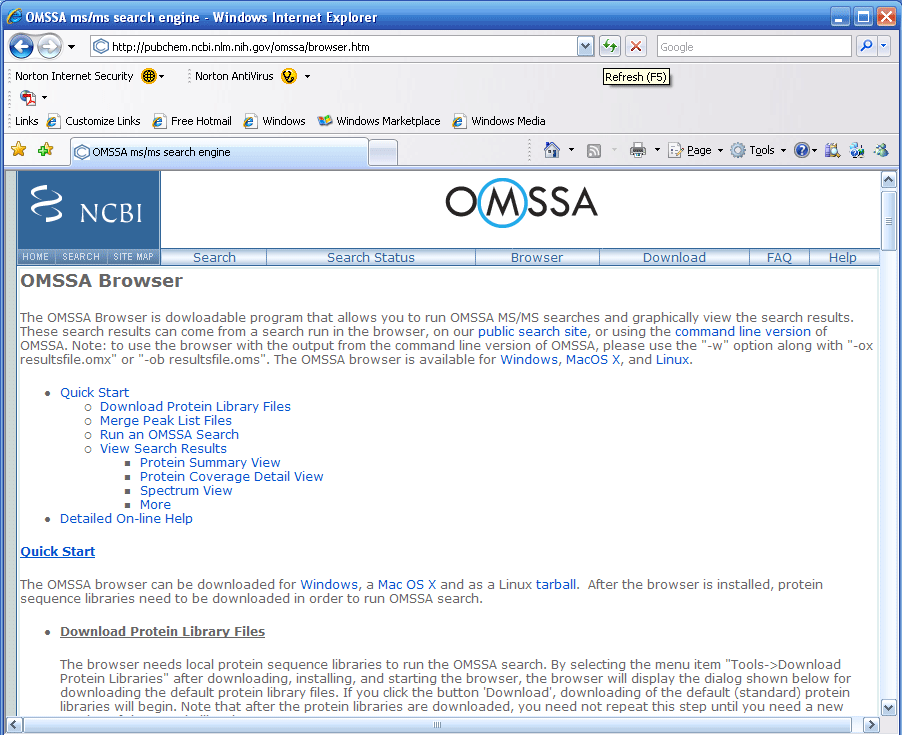
The page in Figure 1 above has a very detailed
installation guide almost making this review unnecessary, however
you might miss the monkey factor. If anyone will run into
trouble with an installation it is us, and we will list our problems
or mistakes or misunderstandings, which might be of some help to you
and perhaps the OMSSA people.
Figure 2 below shows the standard setup icon, which
is what you get when you choose to download the browser version of OMSSA. Double click on the icon and the install shield will start.
Figure 2.
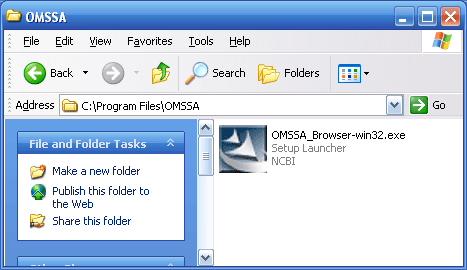
Figure 3.
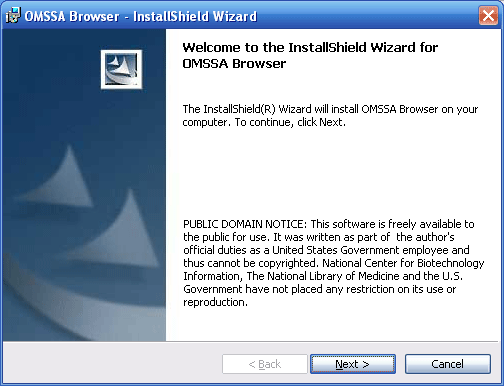
Figure 4.
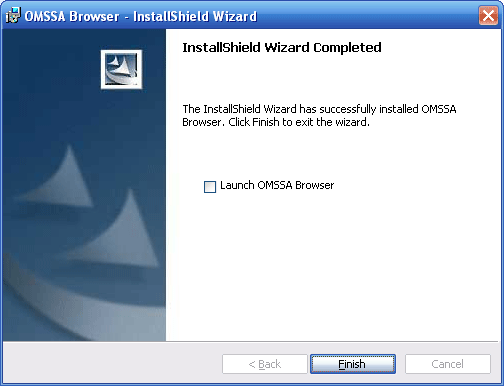
We could not believe it, this was a very easy
installation and it looks like we are ready to launch the OMSSA
browser!
When the OMSSA browser comes up it is blank, see Figure 5 below.
The blank page was a little bit of a surprise, we expected a search
dialog.
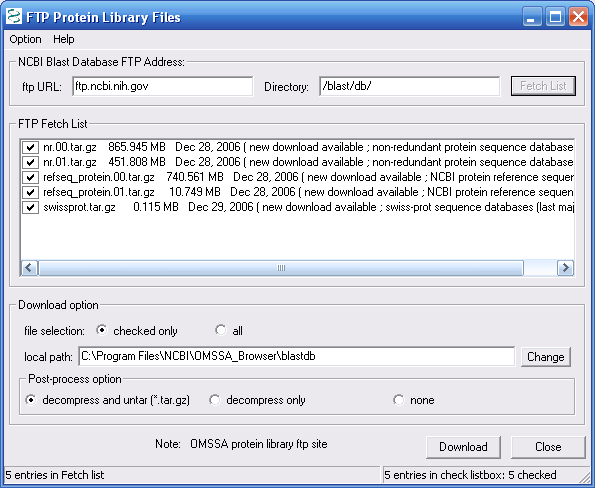
Your first task is to download the protein libraries, which is the
second tab on the Tools list. This will allow you to search the NCBInr and Swiss Prot protein databases, See Figure
6.
Figure 5.

The protein database download will take a while
since the databases are so large. Decompressed, the file size
is about 5 Gig. We recommend, if you have a
fast connection to the internet to start the download right before
you go to lunch, or if you have a slower connection start the
download at the end of the day. We did not see a progress tool
bar for the download which makes it difficult to tell when it is
finished, we think that it took us about an hour. To be safe, start
the download at the end of the day. As shown in Figure 6,
we checked all downloads, and pressed the Download button.
Figure 6.
Once the protein database download is complete go
back to the OMSSA browser, see Figure 5, and from the Tools
menu choose "Run OMSSA Search" to start a search. The
parameters page will come up, see Figure 7 below. If you have
a lot of DTA files, you will need to merge them, this is the first
field shown in Figure 7. Press the the button, "merge files", in
the first field to browse to a folder to merge the files
Figure 7.
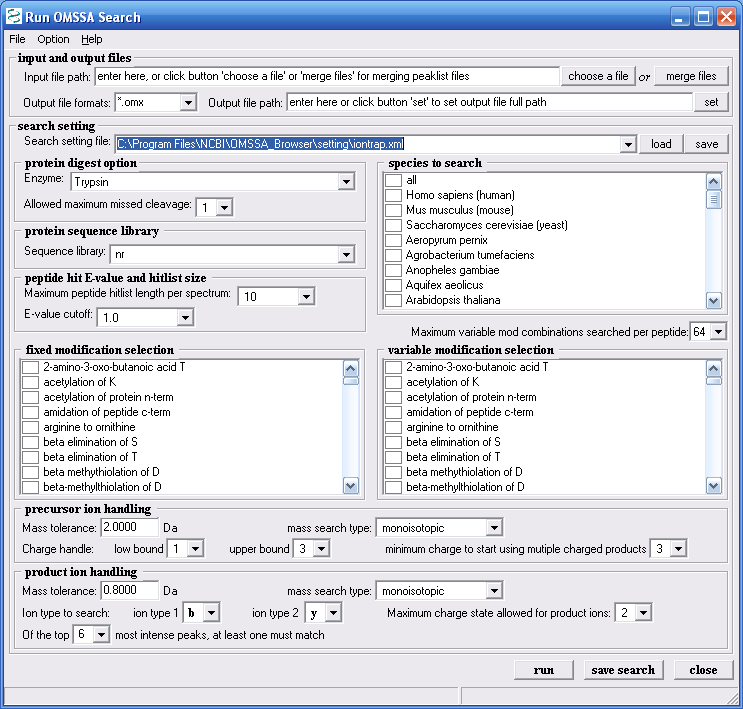
Figure 8. below shows the merge files dialog field.
As shown below you can merge dta, mgf, and pkl files. We
merged about 4000 dtas and the merge time was very short, less than
30s. We selected the add file folders button which made adding
4000+ files very easy.
Figure 8.
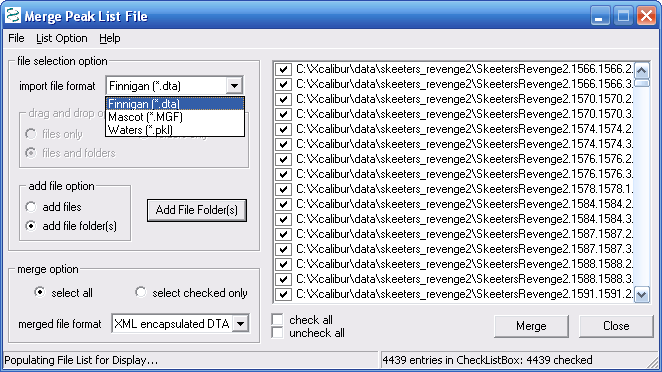
Figure 9 shows the OMSSA search page again. You
can select search settings for ion trap, and for etd data. The
help file that comes along with the browser tells you how to make
your own search settings file to better match your data. Files
can also be made to expand the mods list or the enzyme list and this
discussion is covered in the OMSSA help file, which comes with the
download. Figure 9 shows the parameters we chose for our
example search.
Figure 9.
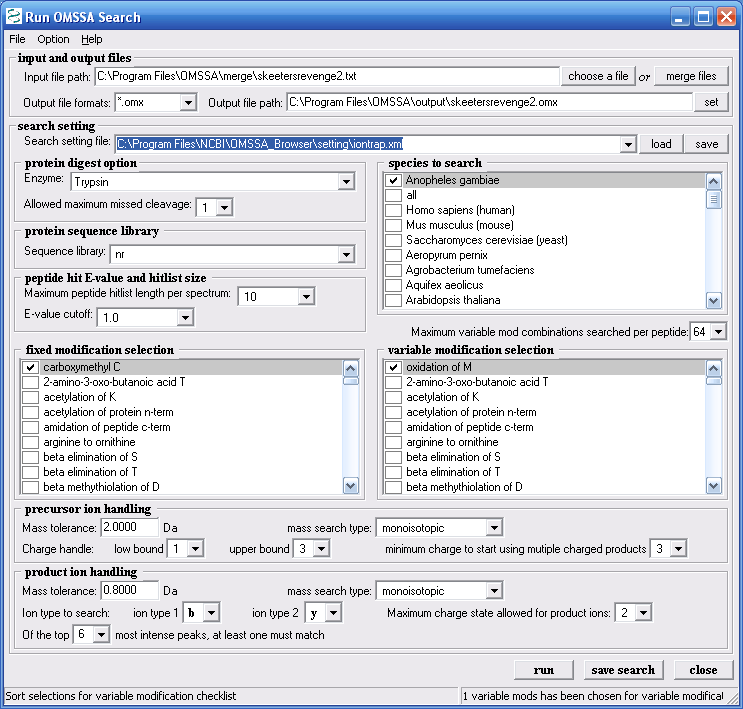
Figure 10 shows the progress bar for the search. This search of
4000 spectra will complete in less than 5 minutes.
Figure 10.
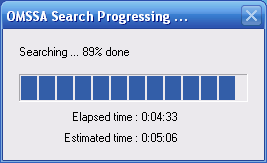
Figure 11 below shows the search output.
Proteins are ranked by protein score. Peptide number and unique
peptides are also listed in the protein summary. If you double
click on the individual protein description the protein details view
comes up, as shown in Figure 12.
Figure 11.

Figure 12 below shows you the protein details view.
Notice the that the protein details view has two tabs, the "Peptide
Hit Details" tab and the "Protein Coverage Details" tab. The
peptide hits detail view is shown below in Figure 12, and the
protein coverage details view is shown in Figure 13.
Figure 12.
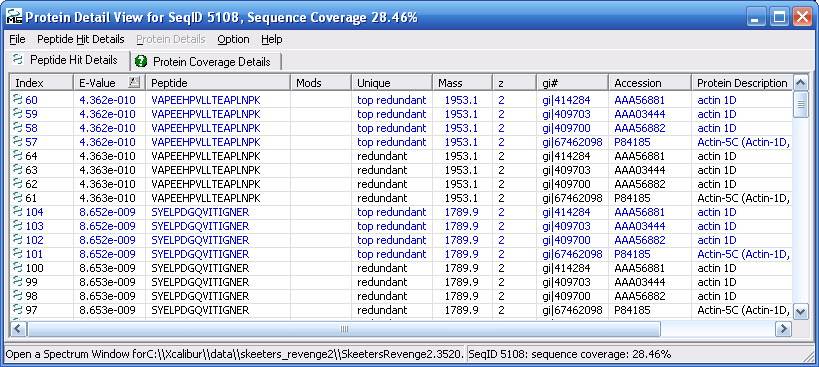
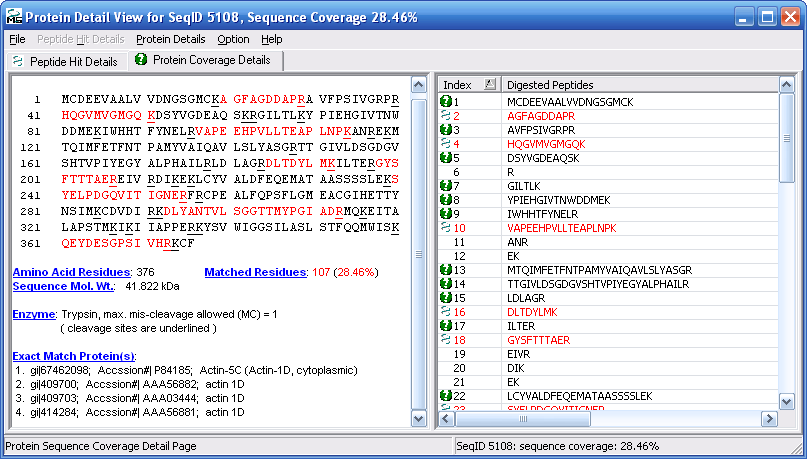
Figure 13 shows the protein coverage view with the
peptides found highlighted in red.
Figure 13.
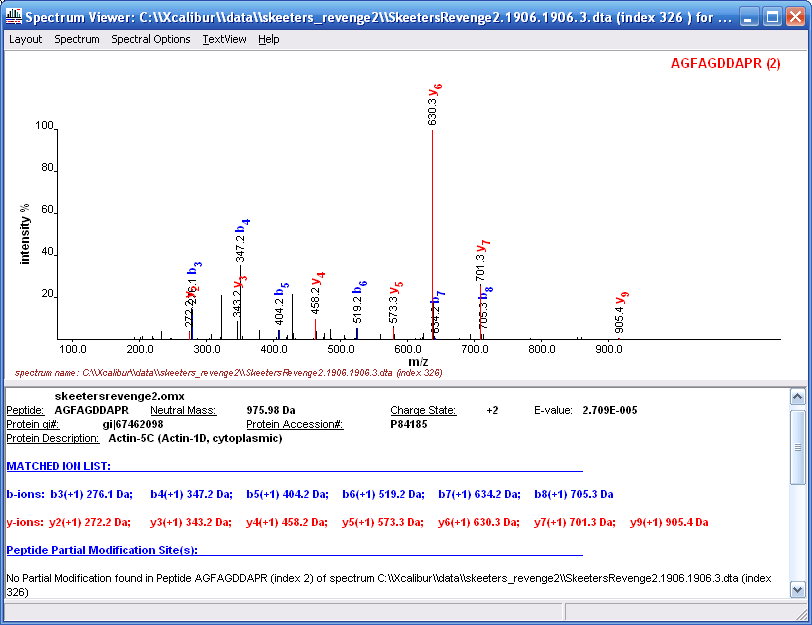
If you double click on any peptide in in the peptide
hits view you will see the matched MS/MS spectrum as shown in Figure
14. They have done a pretty good job at spectrum display and
peak labeling and matching.
Figure 14.
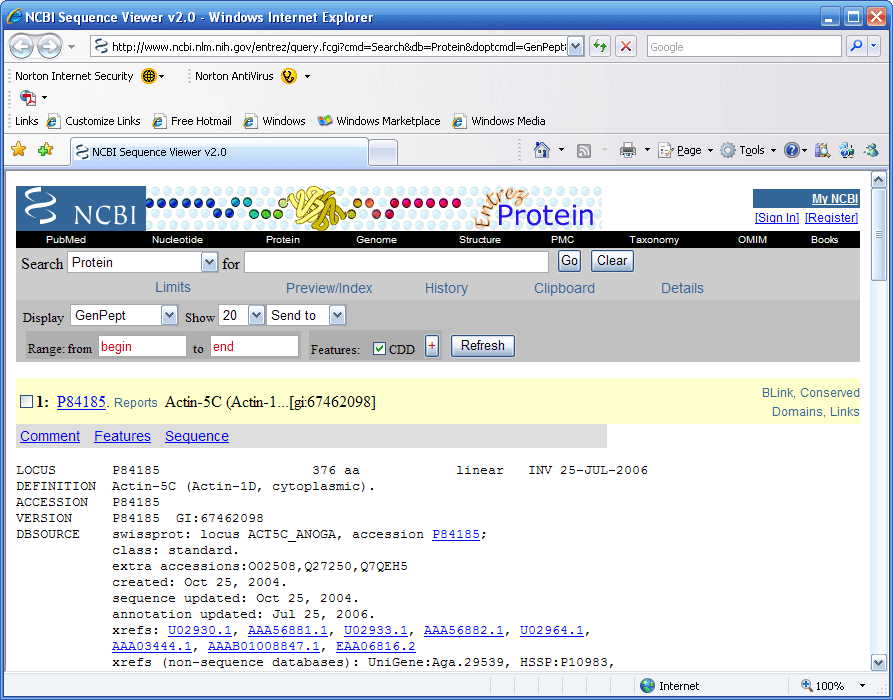
If you go to the protein summary view, (Fig 11), and
pull down the list menu you can bring up the protein record at NCBI
as shown in Figure15 below.
Figure 15.
Conclusion: We were very happy with the
installation of our new free program. The installation was simple.
We have not compiled any comparative data between the current search
engines; Mascot, Phenyx, Sequest, X!Tandem, and OMSSA. If anyone has data
that they would like to share we would like to see it and may consider
posting it at the end of this tutorial. We will add more material
to this tutorial as we gain experience with OMSSA. The one thing
that we can say is that it is entirely free, it can be loaded onto a
local computer and the installation was simple. So far we have a
very favorable impression.
Extras:
1.) Download the Xcalibur (ThermoFisher)
raw data file that we used in this
tutorial. (zipped 9.5 MB)
2.) Download the zipped dta
files associated with the above data file (zipped 3.3 MB)
You can use these files courtesy of IonSource for your own fun or comparisons,
but not for profit. Feel free to to use them in any non-profit publication
or presentation you wish as long as you cite IonSource.com
as the source of the data.
e-mail the webmaster@ionsource.com
with all inquiries
home
| terms of use
(disclaimer)
Copyright © 2006-2016 IonSource, LLC All rights reserved.
Last updated:
Tuesday, January 19, 2016 02:51:47 PM
|


